Taking Better Photos - Building a Light Box
I have often been disappointed with the quality of photos of objects I've posted on my site. My biggest problems have been providing good lighting and a nice background (see this for example). So I was Googling to find a photographer's light box to build when I found Bill Huber's great directions for building your own Light Box. So I built my own light box based on Bill's design.
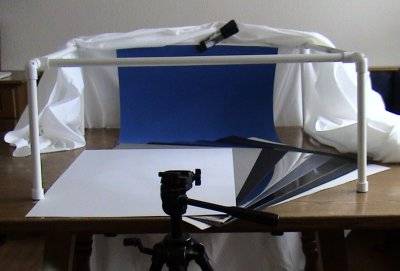
I got two 10 foot lengths of 1/2 PVC and the fittings Bill outlines. Nancy picked up a couple yards of white cloth from the fabric store. I went to a craft store and bought 10 different colored sheets of poster board about 20" by 26". I already had some goose neck desk type lamps into which I put some compact fluorescent bulbs.
I figured I'd size the box so that I could use the poster board oriented in either direction. That made my pipes for the width and depth 28" by 22" (to leave room for the pipe going into the fittings). I made two sets of legs at 12" and 16" long. I got to use my PVC Cutter to quickly cut the pipe. I didn't bother gluing any of the pipe together since the friction fit is plenty tight enough. I also wanted to be able to easily make the box smaller if I over estimated the size I would need. It is a pretty sizeable box.
Light Box with Backgrounds and Cover Sheet Pulled Back

So if you are looking to take photos for your blog or for selling items on eBay this is a simple and inexpensive project. We'll see if it helps my photos look nicer.